
| |
Last fall, when the river was way down because of the drought, I spent some time mulling over my dilemma with my irrigation pump. In the spring, when the river is high, I have difficulty using it because the water is going by the pump so fast it's difficult to get the inlet pipe into the river. I have to tie the end of it into place, so it isn't dragged off downstream like so much flotsom; and use a shorter section so it doesn't stick out into the river so far. Then, as the river drops, I have to add another section to it. All this requires undoing some couplings holding the pieces of intake pipe together, and then putting them back on. Because the pump has to suck the water up out of the river, the couplings have to be absolutely air tight, something not easy to achieve. As a result, I end up spending an inordinate amount of time messing with the intake line. So I did some surveying and learned that if I ran a pipeline from a big pool in the river about 650 feet upstream, I could gravity flow down to the pump, and my current and suction problems would go away. I would have to do this in the fall, when the river was low... which it was.
Because I would be messing up the stream bank below the high water mark, I needed a "310" permit. I put in my application, and the local soil and water conservation district guy, a neighbor, along with someone from the Montana Department of Fish, Wildlife and Parks came out to see what I was proposing.
My original proposal involved putting the pipeline under some overflow channels which are dry except in high water years, and caused some concern. If the channel eroded, the pipeline would be exposed, and probably washed out, and I'd have to go digging in the stream again.
The guys were willing to permit it, but it wasn't the best situation. I did some more mulling and looking and surveying and learned that if I ran another 150 feet further upstream I could avoid crossing any of the dry river channels.
So I modified my proposal, got an ok, ordered pipe, and tried to line up someone to do the work. It was the end of October, and winter was likely to set in any time. I couldn't dig the trench myself because my backhoe is too small. The trench would be over eight feet deep at the start, and this ground is glacial outwash and nothing but big boulders. On top of that, it was bone dry, and freezing at night, so what topsoil there is was at least partially frozen.
Mark Smith was able to do it, and brought his big excavator down. I spent the week before hauling gravel down to the site to use as bedding. I hauled about 70 yards in all, plus some road base which had more clay in it. The road base was to plug the ditch after we laid the pipe coming out of the river, so I didn't have an underground stream running down the pipeline trench.
Unfortunately, as soon as we started work, it got really cold -- -10F. We managed to get all but the last twenty feet of the line laid, however. I didn't want to do the last twenty feet in the cold because it required some careful measuring and fitting where it came out of the ground. We also got it mostly backfilled, but we couldn't spread the topsoil back over it because the topsoil was frozen into huge chunks, like a giant's broken chocolate bar.
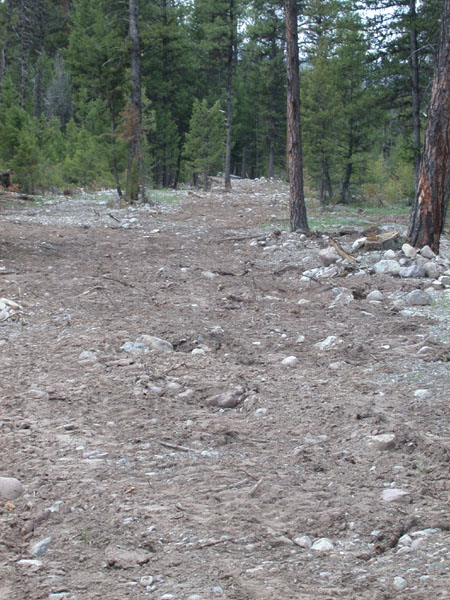
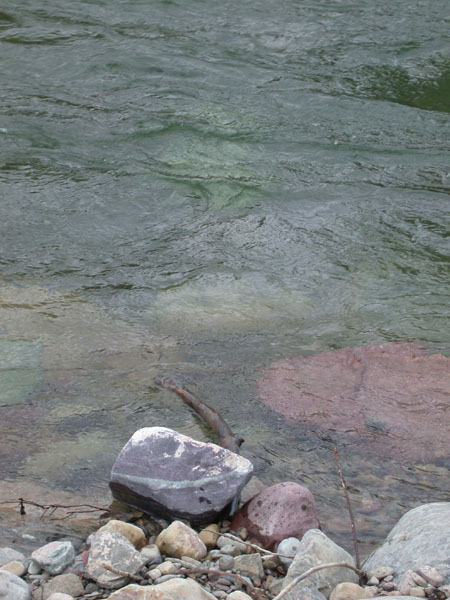
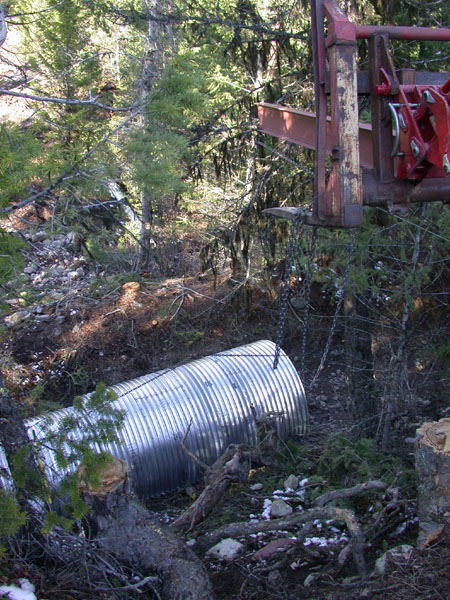
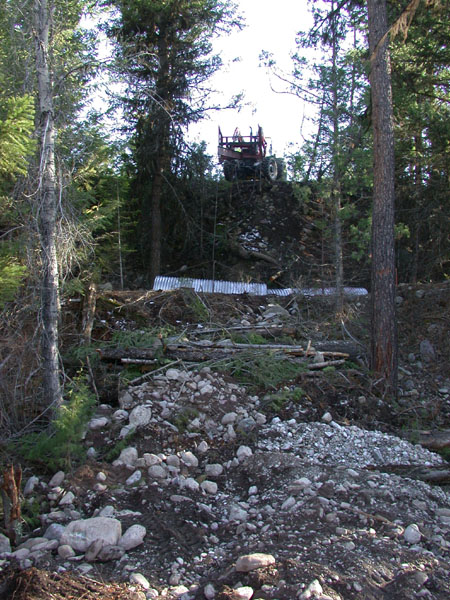
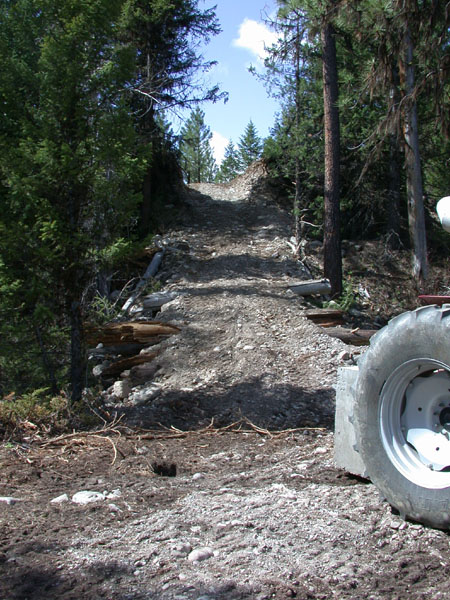
The first photo below is looking from the inlet end of the pipeline down the 800 foot path to the pump. You can just barely see the pipe feeding the pump from the pipeline at the other end, going behind a tree. The second photo is of the inlet. You can't really see it, but there is a steel pipe that goes out into the river. Its end is covered with a screen so no fish or debris goes down the pipeline to the pump. The end is about six inches off the bottom, and about a foot below the top of the water at very low water levels. According to Gary's theory, which will be tested this year, the water going under the pipe will keep it from silting in during high water, a really thorny problem which many pipeline inlets have failed to deal with successfully. The third photo is of the control lever for the valve which lets water into the pipeline. The actual valve is about eight feet underground, in the pipeline. The white pipe sticking up is an air vent to let air out of the line when the valve is opened, and to let air in when it is closed. Otherwise, when you shut the valve, you can collapse the pipe as the water runs out and creates a vacuum behind it. The sock is Gary's temporary air vent, to keep dirt and critters out of the line until I get a proper vent put on.
 |
 |
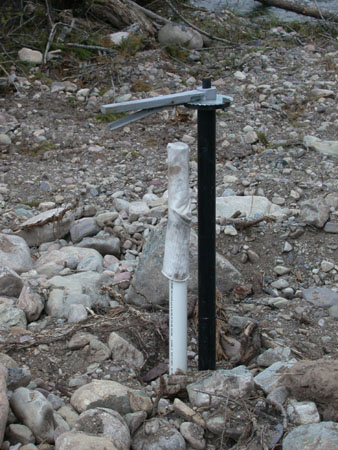 |
| Pipeline, now Covered | Pipeline Inlet | Pipeline Shutoff Valve |
This spring, when I returned from Guatemala, I set about completing things. The first problem, however, was access. In order to get to the site, I have to cross an irrigation ditch which goes to one of my neighbors. Last fall, because the ditch was dry, I could fill it with logs and cross on a "corduroy" road. But that access requires going across a neighbor's property, and through a barbed wire gate, and only works when there is no water in the ditch. In addition, it is very difficult to get any logs out using that route, as the access path winds through some closely spaced trees on the neighbor's property, and I have to put logs on a cart instead of just picking them up with the fork on the tractor. So I decided to make my own access, all on my property, so when I went riding I wouldn't have to deal with the barbed wire gate, and I could more easily get logs out from the bench.
The pipeline is located on the "upper bench", a low lying bench that sits below the "upper pasture" by about twenty five or thirty feet, and is separated from it by a steep bank. The ditch follows a contour line with a slight slope downwards, and unfortunately traverses around along the steep bank. So I would have to put a culvert across the ditch, then cave in the bank.
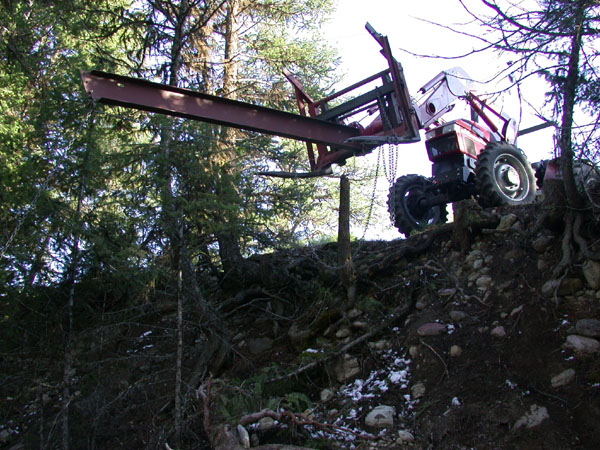
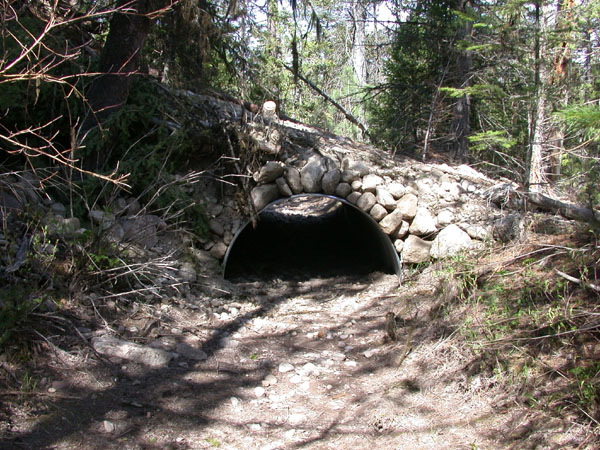
I had purchased a six foot diameter, ten foot long culvert last fall. I cut it in half lengthwise, to make a twenty foot culvert over the ditch. My big problem was figuring out how to lower it into the ditch. I couldn't reach far enough out with the fork on the front end loader on the tractor. So I took a thirteen foot I beam, left over from the arena construction, and attached it to the fork using two sideways guys going from the tip of the beam to the upper sides of the log fork, with the base chained in place in the center. I shackled a big ring on the tip, and ran my chain through that. It was barely long enough, but I was able to lower the two sections into the ditch.
I made a mistake when setting the culverts. I put the downstream section in first, then overlapped it with the upstream section. I should have done it the other way around, so things coming down the ditch are less likely to get caught at the joint. DOH. But it is plenty big enough, and I seriously doubt if it will be a problem, particularly since it is only a half culvert, and the bottom is pure ditch.
 |
 |
 |
 |
| Extension Pole on Log Fork | Setting the First Culvert Section | Setting the Second Culvert Section | View from the Bottom |
As you can see from the photo above looking up towards the culvert, I had already piled big logs and boulders and dirt up at the bottom below the ditch, starting to make the access path. I took the fork off the tractor and put the bulldozer blade on, and began caving in the bank. After two days of sometimes touchy work, I had a way to get down, and up. It's steep, and pretty much requires four wheel drive, but that's fine by me. I'm not planning on driving down there unless I absolutely need to, and I don't want a real road.
 |
 |
 |
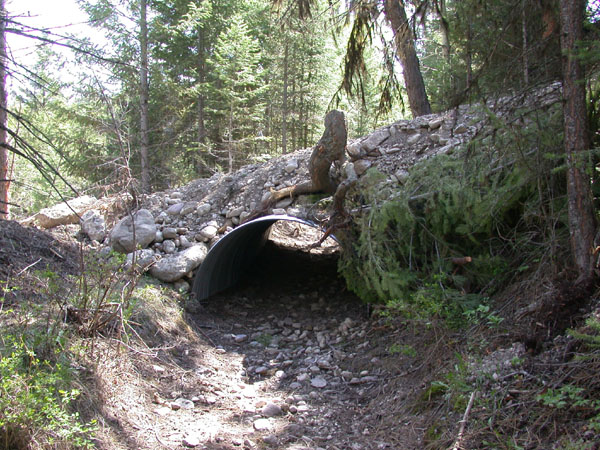 |
| From the Top | From the Bottom | Culvert from Upstream | Culvert from Downstream |
Once I could get the tractor up and down, I set about putting in the last twenty feet of pipeline, backfilling it, and then hooking up the pipeline to the pump. That took a few days. The pipeline comes out of the ground in the center of the photo, with the green collar connecting it to a ninety degree section of aluminum pipe. The aluminum pipe then goes down to the pump, visible closer to the river. To the right of where the pipeline comes out of the ground is a casing around a control rod that goes down to a valve on a drain line. When opened, the pipeline is emptied into the river, something I need to do each fall in case it gets really cold. Hopefully the water above the butterfly valve at the top end won't freeze...
| |
All in all, a worthwhile project. I still need to reseed all the disturbed ground, something I hope to get done in the next few weeks.
This page last updated on 2013-10-23.
![]()